
A backyard can become much more than leftover space behind the house. With the right backyard designer approach, you can turn a plain yard into a practical outdoor living area with patios, pavers, paths, plants, furniture, lighting, and room for everyday life.
This guide walks you through a simple planning process, with a special focus on hardscaping and pavers. You will learn how to assess your outdoor space, create a landscape plan, choose materials, compare paver patterns, and use a landscape design app to visualize your dream yard before installation begins.
What Is a Backyard Designer?
A backyard designer can be a professional designer who plans outdoor spaces, or it can be a digital tool that helps homeowners create and visualize a layout themselves. In both cases, the goal is the same: turn ideas into a clear backyard design that works in real life.
Modern landscape design brings outdoor design, hardscaping, planting, lighting, and furniture into one coordinated landscape plan. Instead of choosing a patio in isolation, you plan how the patio connects to the house, paths, fences, trees, garden beds, and gathering zones.
Today, homeowners can use a backyard designer tool or landscape design app to test patios, pavers, a fire pit, shrubs, trees, accessories, and planting beds before building anything. This is especially helpful for a typical ¼ acre suburban yard, where every square foot of outdoor space needs to work hard.
A good plan helps you decide what should be built first, what can wait, and which design elements will transform the backyard without wasting money.
Start With Your Outdoor Space: Site Assessment & Goals
Before you draw a new layout, study the yard you already have. This basic step gives your backyard designer process the knowledge it needs to avoid costly mistakes later.
Use this checklist before you start designing:
-
Measure the yard. For example, a 40 ft x 60 ft space gives you 2,400 square feet to divide between patio areas, lawn, planting beds, paths, and utility zones.
-
Sketch a simple bird’s-eye layout that includes the house, back doors, gates, fences, utilities, existing concrete, old paver paths, trees, and slopes.
-
Observe sun and shade in different seasons. Morning sun on the east side may suit coffee seating, while afternoon heat on the west side may need shade trees, a pergola, or heat-tolerant plants.
-
Define concrete goals. Do you want to entertain 8–10 guests, create a kid play zone, add a quiet reading nook, build an outdoor kitchen, or keep landscaping low-maintenance?
-
Take a photo from each corner of the property. These photos can be imported into an app, shared with professionals, or used as before-and-after examples once the project is complete.
-
Note drainage issues. Low spots, muddy corners, pooling near the house, and soggy soil can affect paver installation, plant health, and long-term hardscape quality.
-
Identify existing features worth keeping. Mature trees, usable concrete slabs, fences, retaining walls, or old stone paths might be reused instead of removed.
Don’t skip drainage. A beautiful patio can fail quickly if water collects under the base or runs toward the foundation.
Create a Practical Landscape Plan Layout
A landscape plan is a scaled, top-down map of the backyard. It shows where each feature goes before contractors, DIY builders, or family members start moving materials.
You can draw the yard on graph paper or use a simple digital tool. A helpful scale is 1 square = 2 feet, which makes it easier to test patio sizes, path widths, lawn shapes, and planting bed depth.
Start by zoning the outdoor space into clear areas:
-
Dining patio near the kitchen door
-
Fire pit lounge away from overhanging branches
-
Lawn or open play area
-
Garden beds along fences
-
Utility zones for trash bins, storage, compost, or a shed
-
Paver paths that connect doors, gates, seating, and work areas
Think about real-world movement. The main paths should follow how people already move: from the back door to the grill, from the driveway gate to the shed, or from the patio to the garden.
Use these practical size guidelines:
|
Feature |
Recommended starting size |
|---|---|
|
Dining patio for a table and chairs |
At least 12 ft x 14 ft |
|
Lounge area with sectional and fire pit |
About 14 ft x 16 ft |
|
Main walking paths |
Minimum 3 ft wide |
|
Service path for wheelbarrow access |
3–4 ft wide |
|
Planting bed along fence |
3–6 ft deep |
|
Leave circulation space between hardscaping elements, doors, planting beds, and furniture. A chair that backs into shrubs or a grill that blocks the only walkway will make the design feel cramped, even if it looks good on paper. |
|
Designing Hardscaping and Pavers
Hardscaping and pavers are the backbone of backyard design and outdoor living. They define where people sit, walk, cook, gather, and enjoy the yard.
Hardscape includes patios, walkways, retaining walls, steps, fire pit surrounds, sitting walls, edging, raised planters, and built-in grill islands. These are the permanent or semi-permanent elements that give the space structure.
Common paver choices include:
-
Concrete pavers: widely available, versatile, and often more budget-friendly. They come in many colors, shapes, and textures, but usually need sealing every few years to reduce staining and fading.
-
Porcelain pavers: dense, modern, stain-resistant, and low-maintenance. Porcelain has very low water absorption, often under 0.5%, which makes it strong for freeze-thaw conditions and pool areas.
-
Natural stone: bluestone, travertine, slate, granite, and limestone create a premium look. Each stone has different slip resistance, heat performance, porosity, and cost.
-
Permeable pavers: designed with wider joints and an open-graded base that lets water filter through, helping reduce runoff in rainy areas or regulated stormwater zones.
Pair paver style with the architecture of the house. Modern linear slabs suit contemporary homes, while tumbled brick pavers can look natural beside a 1920s bungalow. Bluestone often fits traditional or transitional homes, while light porcelain can suit sleek pool decks and warm climates.
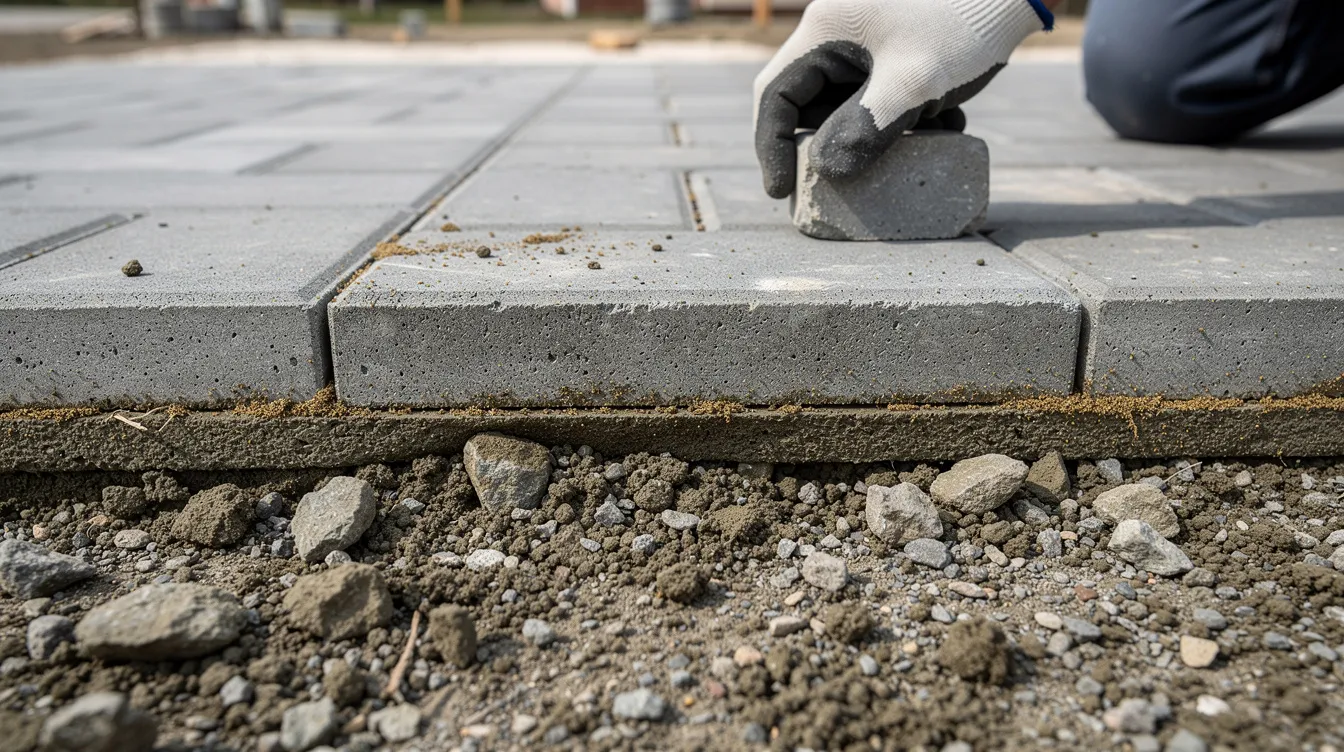
The details under the pavers matter just as much as the surface. For most pedestrian patios and walkways, a 4–6 inch compacted gravel base plus a 1-inch bedding layer of coarse concrete sand is a common standard. Driveways usually need 8–10 inches or more of compacted base. The surface should also slope away from the house by about 1%–2%, or roughly 1/8 to 1/4 inch per foot, to move water away from foundations.
According to technical paver installation guidance, angular crushed aggregate is preferred because it locks together when compacted, while rounded stone can shift over time. Proper base depth, compaction, drainage, and edge restraints are what keep a patio from settling, spreading, or becoming uneven, especially when paired with professional landscape and hardscape services.
Choose one main gathering space as the focal point of the outdoor design. For many homeowners, that is a paver patio with a built-in fire pit, comfortable seating, and planting beds around the edges.
Choosing the Right Paver Patterns and Layout
The paver pattern affects both style and performance. Some layouts are fast and simple, while others provide stronger interlock for high-traffic areas.
Use these pattern ideas as a starting point:
-
Running bond: A classic offset pattern that works well for simple walkways and patios. It can make narrow side yards look longer and usually creates less cutting waste.
-
Herringbone: A strong interlocking pattern for driveways, high-traffic paths, and busy patio entries. A 45-degree or 90-degree herringbone distributes load well, though it requires more cutting.
-
Stacked pattern: A clean grid layout using large-format pavers. This is a strong visual choice for modern outdoor living spaces with straight lines and minimal detailing.
-
Basket weave: A traditional look that suits brick or brick-style pavers, especially around older homes.
-
Modular layout: A mix of paver sizes that creates a natural, less repetitive appearance for large patios.
Borders are a simple way to sharpen the layout. A dark charcoal paver border around light gray field pavers can frame a patio, define curves, and make the design look intentional.
You can also mix textures, such as smooth slabs with rough cobbles, to add interest. Keep the color palette limited to 2–3 tones so the space feels coordinated rather than busy.
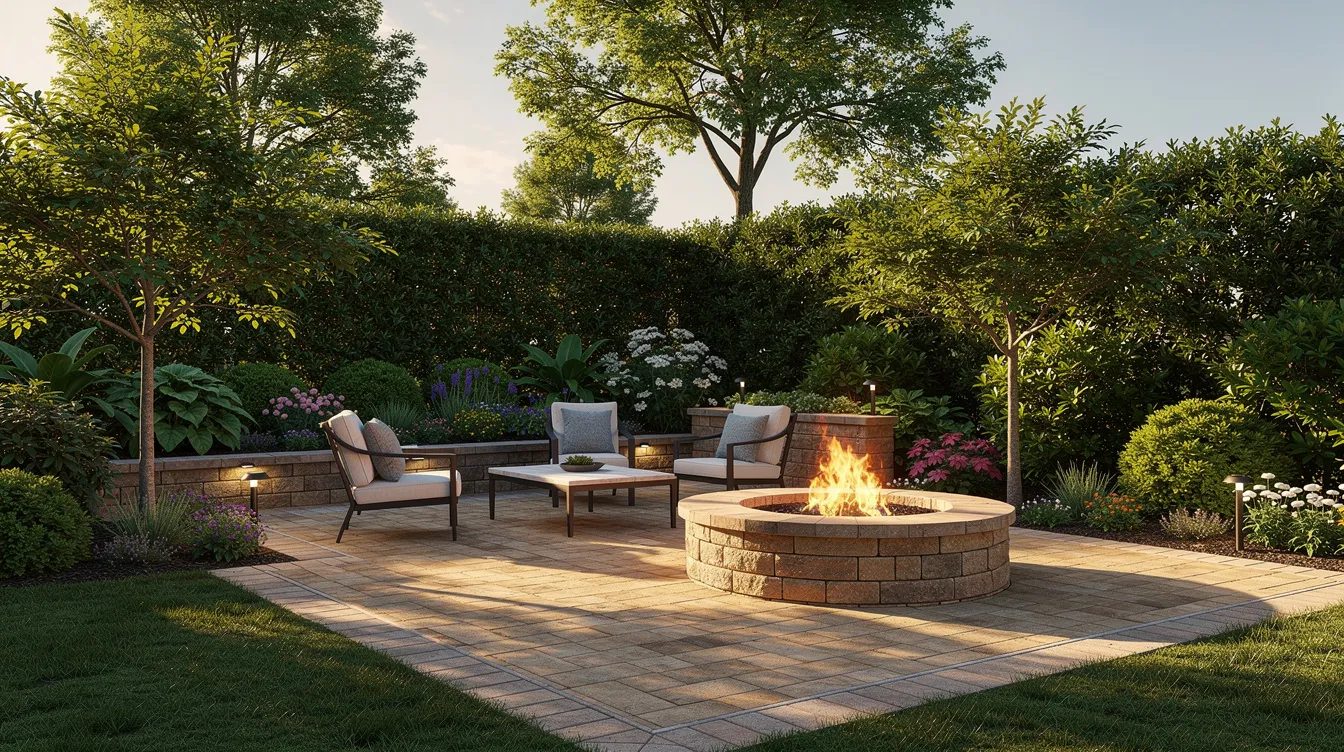
Integrating Fire Pits and Outdoor Features
A fire pit is one of the highest-impact features in backyard design because it gives people a reason to gather after sunset. It can anchor the seating area and make the backyard feel useful beyond warm afternoons.
There are two common options:
-
Wood-burning fire pit: Offers classic flames, crackle, and campfire atmosphere. It usually needs more clearance, produces smoke, and may be restricted by local code.
-
Gas-powered fire pit: Cleaner, easier to start, and often better for regular use. It requires a gas line or propane setup and should be planned before pavers are installed.
For size, a 36–48 inch diameter wood-burning fire pit works well in many residential yards. Leave at least 6 ft of clearance around the fire pit for seating, circulation, and safety. Always check local code, fire rules, and manufacturer guidance before installation.
Use matching pavers, coping, or stone veneer to connect the fire pit, seat walls, steps, and patio into one cohesive hardscape palette. Related outdoor living additions, such as grill islands, outdoor kitchens, water features, pergolas, and lighting, should align with the main paver layout instead of feeling added later.
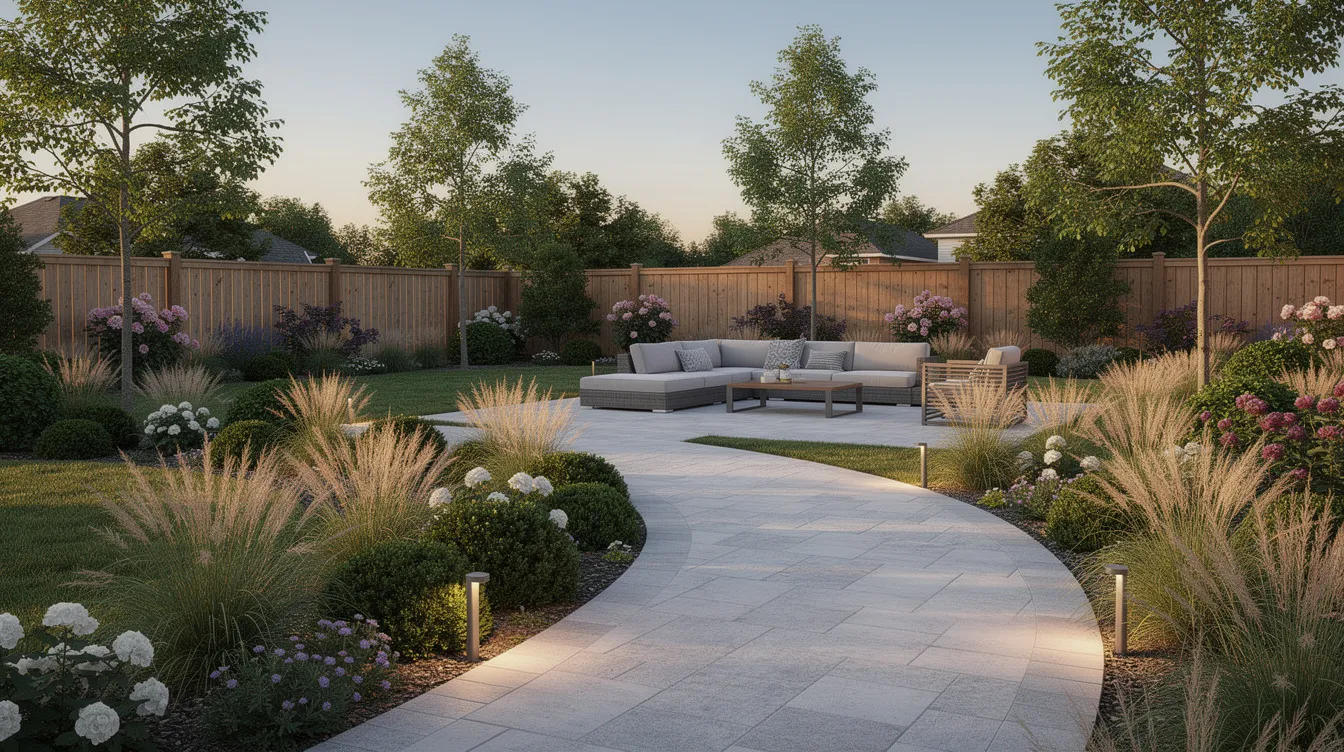
Blending Softscape With Hardscape
Hard surfaces make a backyard usable, but plants make it welcoming. The best backyard designer plan balances stone, greenery, shade, seasonal change, and open space.
Softscape elements include lawn, shrubs, perennials, ornamental grasses, trees, groundcovers, and vines. These elements weave between patios and paths, soften edges, and help the backyard feel alive.
Frame paver patios with planting beds that hide fence lines and reduce the harsh edge where stone meets lawn. Use layered heights: taller shrubs at the back, medium perennials in the middle, and groundcovers or low grasses near the front.
Choose native or climate-appropriate plants that can thrive with less maintenance. For example:
-
Dry, sunny zones: lavender, rosemary, salvia, and ornamental grasses
-
Cool or temperate regions: hydrangea, switchgrass, serviceberry, and native asters
-
Hot southern yards: yaupon holly, muhly grass, lantana, and live oak where space allows
Avoid plants that overrun narrow walkways, drop messy fruit onto pavers, or require constant pruning beside seating areas. Evergreen structure near hardscaping is also helpful because it keeps the backyard design looking finished in winter or dormant seasons.
Color, Texture, and Seasonal Interest
Good planting is not only about plant names. It is about how colors, textures, and forms support the hardscape.
-
Coordinate plant colors with paver tones. Cool blues and whites look sharp against gray stone, while warm oranges, reds, and golds pair well with tan pavers.
-
Mix leaf textures. Fine grasses beside broad-leaf shrubs create contrast near smooth patio edges.
-
Plan for four-season interest. Use spring bulbs near paths, summer flowering perennials by the seating area, and fall foliage trees at property corners.
-
Repeat key shapes. Rounded shrubs can soften square patios, while upright grasses can echo modern vertical fences.
-
Match accessories to the palette. Lighting hardware, furniture fabrics, pots, and cushions should repeat the hardscape colors.
This is where inspiration becomes practical. Save examples you like, but edit them to suit your climate, budget, and maintenance level.
Using a Landscape Design App as Your Backyard Designer
A landscape design app can function like a virtual backyard designer, serving as a digital tool for planning and visualizing outdoor spaces. Instead of guessing how a patio or path will look, you can experiment on a device and adjust the layout before spending on materials.
Start by importing a property survey, satellite image, or overhead photo into the app. Then trace the yard outline, house, doors, fences, existing trees, concrete areas, and utilities.
Most apps let you drag and drop patios, paver paths, fire pits, planting beds, furniture, trees, shrubs, and accessories. Some include a vast library of plants, pavers, outdoor kitchens, water features, lighting options, and design templates.
The best part is speed. You can create several versions quickly by breaking a larger backyard project into manageable design tasks or zones:
-
Family-friendly layout with lawn and play space
-
Low-maintenance layout with more hardscape and drought-tolerant plants
-
Entertaining-focused layout with a larger patio, fire pit, and dining area
Many tools also include 3D views or AR features that help you visualize changes in real time before making physical changes. These advanced features are helpful, but not every homeowner needs them. If you are new to design software, look for a clean interface, a free version, and basic tools without steep learning curves. Many apps also serve both DIY users and professionals with different levels of complexity.
Use the app to explore ideas, compare shapes, experiment with materials, and realize what fits your yard. Then save the best plan as a PDF or image that you can share with contractors, professionals, family members, or a community garden group if the project connects to shared space. Some tools also include collaborative features so homeowners and professionals can work on the same design together.
From Concept to Contractor-Ready Plan
A sketch is helpful, but a contractor-ready plan needs dimensions, labels, and material choices. This turns a backyard designer concept into documents that crews and clients can understand.
Add dimensions directly to the design tool:
-
Patio length and width
-
Walkway width
-
Planting bed depth
-
Fire pit diameter
-
Seat wall length
-
Steps and elevation changes
-
Distance from doors, fences, trees, and utilities
Create a materials legend that lists paver models, colors, border pavers, edging, joint material, gravel base requirements, and lighting locations. For paver areas, note base expectations such as compacted gravel depth, coarse bedding sand, and slope away from the house.
This level of detail makes it easier to get comparable quotes from multiple hardscaping contractors. If each contractor prices the same layout and materials, you can compare cost, timeline, installation method, and warranty more fairly, or reach out to top landscape services in your area with a clear scope in hand.
A clear plan also reduces change orders. Crews know where to install pavers and features, and homeowners are less likely to make expensive decisions in the middle of construction.
Budgeting and Phasing Your Backyard Design
Most dream yards are built in phases over 1–3 years. That is normal. A good backyard designer plan lets you build in the right order instead of doing the same work twice, while spreading spending and other resources more effectively over time.
Prioritize structural hardscaping first:
-
Drainage corrections
-
Retaining walls or grading
-
Main paver patio
-
Primary walkways
-
Utility sleeves for lighting, irrigation, or gas
-
Fire pit or outdoor kitchen rough-ins
-
Planting beds, lighting, furniture, and décor
A simple budget breakdown might look like this:
Set a realistic budget before hiring a designer, and confirm whether they charge hourly or a flat fee.
|
Category |
What to include |
|---|---|
|
Hardscaping |
Pavers, base, edging, walls, steps, labor |
|
Plants |
Trees, shrubs, perennials, groundcovers, mulch |
|
Lighting |
Path lights, uplights, transformers, conduit |
|
Furniture |
Dining set, lounge seating, cushions, storage |
|
Future upgrade |
Pergola, outdoor kitchen, water features |
|
Concrete pavers are often the most accessible option, while porcelain and natural stone usually sit higher in the market. Installed costs vary widely by region, access, soil conditions, pattern complexity, and material quality. In many areas, concrete paver installations can fall in a broad range of about $12–$40 per square foot, while porcelain often costs more because it requires precise cutting and installation. |
|
Design with the end in mind, even if you install in stages. For example, build the main paver patio now, add the fire pit area next season, and upgrade to a pergola or outdoor kitchen later. Leave gas lines, conduit, and irrigation sleeves in place during the first phase so you do not have to tear up new pavers.
A well-planned landscape design can increase property value, improve daily use, and reduce costly rework over time. It also gives you more control, because every phase supports the final vision instead of chasing disconnected dreams.
Bringing Your Dream Yard to Life
Thoughtful planning can transform almost any outdoor space into a personal retreat. Start by assessing the yard, create a clear landscape plan, prioritize hardscaping and pavers, layer in plants and lighting, and use design apps for visualization before construction.
You do not need to finish everything at once. Begin with a simple sketch today, even if installation happens later. That first plan will help you clarify your ideal backyard design, decide what to build first, and avoid watching the budget drift toward features that do not suit your goals.
Take before photos now, then take after photos once the pavers, fire pit, planting beds, and furniture are in place. The comparison will show more than a new patio; it will show how a practical plan can bring your outdoor dreams to life.
The hope is simple: your backyard should feel like an extension of your home. With the right backyard designer process, it can become a space for quiet mornings, weekend meals, neighborhood gatherings, and everyday outdoor living.