
A pavers patio transforms your backyard from bare ground into a functional outdoor living space that can last decades. Whether you’re planning a cozy fire pit pad, a full outdoor kitchen, or a sprawling lounge area, the material you choose, the pattern you pick, and the installer you hire all shape the final result. This guide covers everything homeowners need to know in 2026-from materials and costs to installation steps and long-term care-so you can make confident decisions and find the best paver installers with a warranty and several patterns to select from.
Key Takeaways
-
A pavers patio offers more design flexibility, easier repair options, and higher curb appeal than plain poured concrete because individual units can be lifted and replaced without tearing up the whole surface.
-
The best patio pavers include concrete, natural stone, brick, and porcelain, each with distinct looks and price ranges-from budget-friendly concrete pavers starting around $14 per square foot installed to premium cobblestone pavers that can reach $50 or more.
-
Realistic 2026 costs for a professionally installed patio range from roughly $2,900 for a simple project up to $18,000+ for large outdoor rooms, and pattern complexity or extensive base preparation can significantly shift the final price.
-
Proper base construction, drainage slope, and joint filling are non-negotiable steps; skipping steps in paver patio construction often leads to sinking or shifting that’s expensive to fix later.
-
Digital Vibes Agency helps paver installers and local contractors attract more patio projects online through SEO, PPC, and high-converting portfolio pages that showcase warranty coverage and pattern options.
What Is a Pavers Patio?
A pavers patio is an outdoor living surface built from individual units-called paving stones or pavers-rather than a single poured concrete slab. These units are laid over a compacted gravel base and a sand bed, then locked together with joint sand and edge restraints to create a stable, attractive surface.

-
Pavers can be made from concrete, brick, stone, or clay, giving homeowners wide latitude in colors, textures, shapes, and sizes to match any architectural style.
-
Common uses include outdoor dining areas, lounge zones, fire pit spaces, pool decks, barbecue pads, walkway connections between house and garden, and even accent walls flanking seat benches.
-
Individual units interlock or fit tightly together, making repairs straightforward. If one paver cracks, you lift it out and drop in a replacement-no jackhammering, no patch that never quite matches. Interlocking pavers are popular for their non-slip and removable features, which simplify maintenance over time.
-
Compared to a poured concrete slab (which commonly cracks with soil movement or freeze-thaw cycles), a pavers patio flexes with minor ground shifts and rarely shows catastrophic damage. Compared to wood decks, pavers resist rot, pest damage, and warping, and they typically require less annual upkeep.
-
Homeowners can choose from concrete pavers, brick pavers, flagstone pavers, and cobblestone pavers depending on the look they want and the budget they’re working with. Each type brings a different aesthetic and lifespan, which we’ll break down next.
Choosing Patio Paver Materials
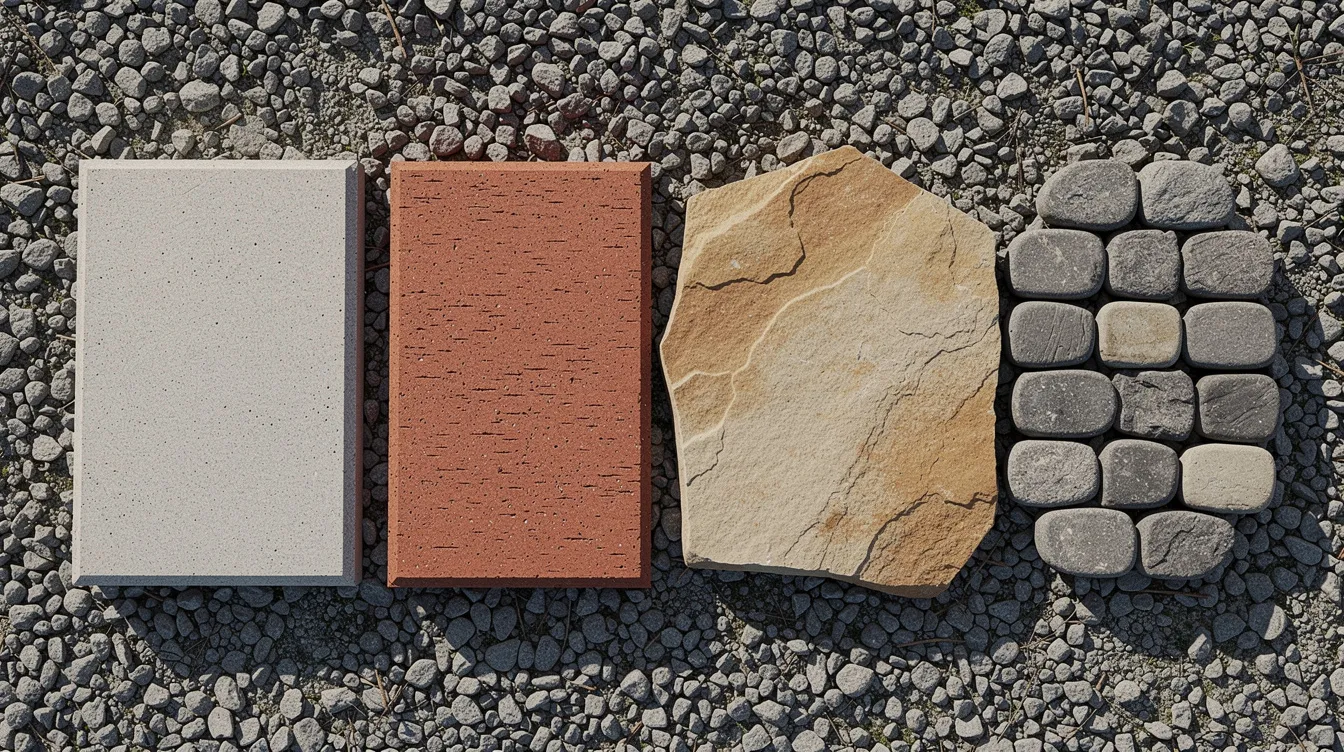
Selecting the right material is the single biggest decision you’ll make. It determines the look, the feel underfoot, the maintenance schedule, and roughly half of your total project cost. Here’s how the four major paver types-plus a couple of premium alternatives-stack up in 2026.
Concrete Pavers
-
Molded units made from cement, aggregate, and pigments.
-
Highly versatile, available in countless shapes and colors, from warm earth tones to cool gray and charcoal shades.
-
Durable and weather-resistant, can mimic the look of natural stone or brick at a lower price point.
-
Least expensive option for patios, with 2026 installed costs often in the $14–$24 per square foot range depending on pattern and local labor.
-
With proper maintenance, concrete pavers can last up to 50 years.
Brick Pavers
-
Made from natural clay and fired in a kiln.
-
Available in red, brown, and charcoal tones that won’t fade the way surface-colored concrete sometimes does.
-
Provides a warm, historic feel and weathers beautifully over time, ideal for colonial-, Spanish-, or craftsman-style homes.
-
Expect to pay roughly $18–$28 per square foot installed in 2026; material-only level often costs between $6 and $12 per square foot before labor.
-
Shapes are mostly rectangular, but the classic look compensates for limited variety.
Flagstone Pavers
-
Irregular or cut slabs of sandstone, slate, bluestone, or similar natural stone.
-
Known for organic shapes and rich color variation.
-
Provides organic, high-end aesthetics and includes granite, limestone, and bluestone among its many options.
-
Non-slip feature and unique shapes create a one-of-a-kind surface, though the irregularity adds labor during installation.
-
Installed costs typically run $24–$40+ per square foot in 2026 because each piece requires more cutting and leveling.
-
Bluestone pavers are available in various shapes and sizes, offering a blue-gray palette that suits both rustic garden settings and sleek modern courtyards.
Cobblestone Pavers
-
Small, thick blocks-often granite or basalt-that evoke old European streets.
-
Most durable pavers, lasting up to 100 years with proper maintenance.
-
Material costs between $16 and $30 per square foot; installed costs in 2026 commonly reach $30–$50 per square foot.
-
Most expensive option in most paver lineups, but the visual weight and permanence are hard to match.
Premium Alternatives
-
Porcelain: Dense, non-porous, and fade-resistant, making it a strong fit for pool decks and modern outdoor rooms.
-
Limestone: Can be polished for a smooth finish that reads as refined and contemporary.
-
These materials typically land in the $18–$30+ per square foot installed range.
Climate Matching
-
In hot climates, lighter-colored stone or porcelain stays cooler underfoot.
-
In freeze-thaw zones, choose materials with low water absorption and invest in a deeper base.
-
An architect or landscape designer can help you select materials that work for your region.
-
Always consult local building codes and HOA rules before constructing a patio-some communities require permission for hardscape projects above a certain size.
Contractor Selection
-
When evaluating contractors, look for the best paver installers with a warranty and several patterns to select from.
-
Reputable installers will show you samples across these material categories so you can see how various colors, textures, and thicknesses look and feel before committing.
Safety, Texture & Accessibility on Paver Patios
The surface you walk on every day needs to be safe in all weather conditions. Here’s how texture and layout choices affect comfort, accessibility, and risk.
Smooth Concrete Pavers
-
Work best near dining tables, doorways, and main access points.
-
Make it easier to roll strollers, grills, walkers, or wheelchairs without catching on uneven edges.
-
For anyone with mobility concerns, a flat, uniform surface with tight joints is the safest choice.
Textured Cobblestone and Flagstone
-
Highly textured cobblestone pavers and heavily cleft flagstone can be beautiful but may feel less comfortable under bare feet or for mobility devices.
-
Best placed near garden paths, fire pits, or decorative borders rather than primary walkway routes where smooth travel matters most.
Slippery Surfaces
-
Ultra-smooth or polished stone and sealed surfaces can become slippery when wet.
-
For patios near a pool or in a rainy climate, choose slightly textured finishes and slip-resistant sealers.
-
Flagstone pavers can create a non-slip surface for patios without sacrificing their natural character.
Joint Spacing and Base Layers
-
Consistent joint spacing and well-compacted base layers prevent pavers from settling over time and creating raised edges that cause trips.
-
Polymeric sand in joints also limits weed intrusion, which can push pavers apart if left unchecked.
Evening Safety
-
Step lights, low-voltage path lights, or string lighting around the patio perimeter reduce tripping hazards and extend usable hours.
-
A slight slope away from your home’s foundation (roughly a quarter-inch per foot) is needed for proper water drainage-pooling water becomes both a slip hazard and a structural risk.
Popular Paver Patio Patterns & Layout Ideas
The pattern you choose changes the character of a patio almost as much as the material itself. It also affects installation time and cost, because complex geometry means more cuts, more waste, and more skilled labor.
-
Running Bond and Stack Bond
-
Running bond and stack bond patterns use concrete or brick pavers and are the most cost-effective options.
-
Running bond offsets each row by half a unit, giving a subtle rhythm.
-
Stack bond lines joints up for a sleek grid effect.
-
These patterns speed up installation, reduce cut waste, and create a clean, modern look well-suited to minimalist backyards.
-
-
Herringbone
-
A timeless pattern commonly used with brick pavers or rectangular concrete pavers.
-
The angled arrangement resists lateral movement under heavy foot traffic, making it a practical choice for busy patios and driveways.
-
Expect roughly 10–15% more labor and higher cut waste compared to a simple bond pattern.
-
-
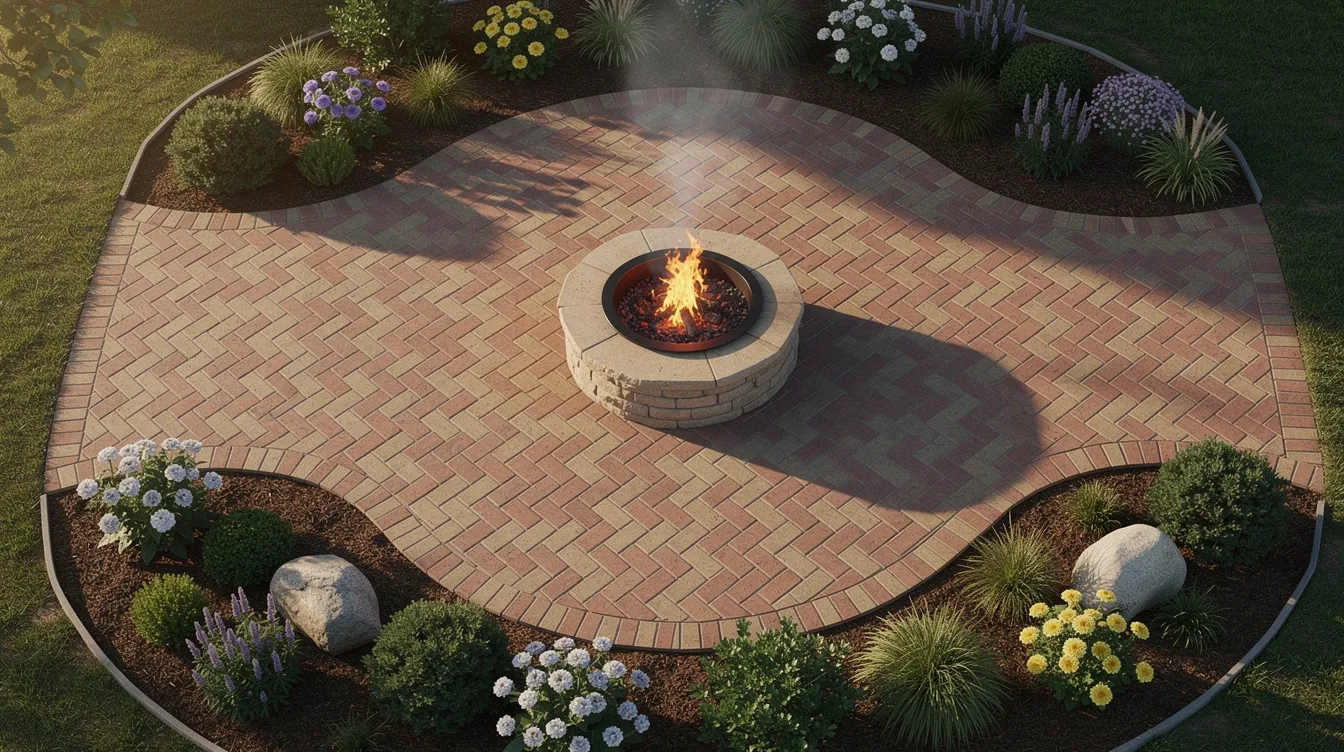
Circular or Fan Layouts
-
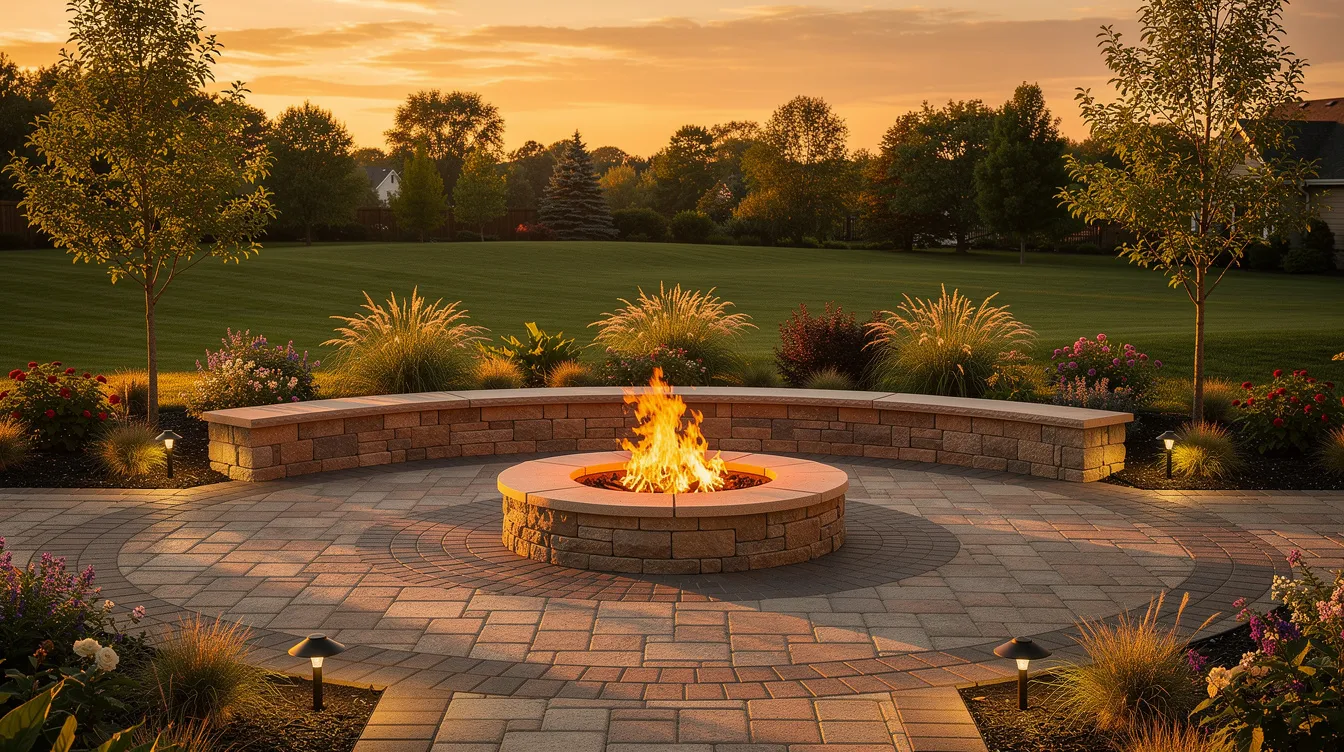
Use cobblestone pavers to create dramatic effects around fire pits or conversation circles.
-
These patterns require more cutting and skilled installers, which can raise labor cost by 20–30%.
-
The payoff is a focal point that draws the eye and anchors the space.
-
-
Grid and Large-Format Slab Layouts
-
Use oversized concrete or flagstone pavers to deliver a contemporary, high-end look.
-
Narrow joints-or groundcover planted between stones-blur the line between hardscape and garden.
-
Fewer joints mean fewer places for weeds, but the individual units are heavier, so handling and base prep need extra care.
-
-
Mixed-Material Designs
-
Blend a field of neutral concrete pavers with a border of brick pavers or cobblestones to frame the space and tie in home colors.
-
Contrasting stone can be used for accent walls, seat caps, or step treads to create visual depth without overwhelming the design.
-
-
The best paver installers with a warranty and several patterns to select from will typically show you 3–5 pattern boards or past project photos during their estimate visit. Ask to see examples in materials similar to what you’re considering-it’s the fastest way to explore how a pattern will actually look once built.
Paver Patio Costs in 2026
Understanding where your money goes helps you set a realistic budget and avoid sticker shock. Here’s a breakdown of what to expect this year.
-
Ballpark range: Many professionally installed paver patios fall between about $3,500 and $18,000+ in 2026, depending on size, materials, and complexity. A small 10×12-foot space on flat ground with basic concrete pavers sits near the low end, while a large outdoor room with natural stone, a fire pit, lighting, and seat walls pushes well past the high end. A typical paver patio costs between $2,900 and $4,000 for modest projects using standard materials.
-
Cost drivers: Total price hinges on patio square footage, material type (concrete vs. brick vs. flagstone vs. cobblestone), pattern complexity (herringbone and circular layouts cost more than running bond), edge restraints, steps, and built-in features like seating walls or accent walls. Paver installation can be more costly than concrete due to labor, especially with premium stone or intricate patterns.
-
Base preparation is a hidden heavyweight. Excavation, removal of old concrete, adding compacted gravel, and leveling bedding sand can represent 35–50% of the total project cost. A sturdy base is critical to prevent future settling in a paver patio, so this isn’t the line item to cut.
-
DIY vs. professional installation: DIY might reduce labor spending by 40–60%, but mistakes in grading, compaction, or pattern layout can lead to settling and drainage problems that are far more expensive to fix after the fact. For most homeowners, hiring a pro and getting it right the first time saves money in the long run.
-
Warranties matter. Reputable installers in 2026 typically offer written labor warranties of 2–5 years for paver patios, covering settling, joint failure, or edge movement. Manufacturers also warrant the pavers themselves against defects-ask for documentation on both before signing.
Step‑by‑Step Overview of Paver Patio Installation
You don’t need to become a contractor to get a great patio, but knowing the major stages helps you ask better questions and spot red flags. Here’s what professional installation looks like from a homeowner’s perspective.
-
Planning and design. Measure the space, confirm property lines, and check for underground utility lines (call 811 in the U.S.). Choose your material, colors, and pattern. If you’re designing a complex layout-multiple levels, integrated fire pit, built-in seating-consulting an architect or landscape designer at this stage prevents costly redesigns later. Local building codes and HOA rules should be consulted before constructing a patio to confirm you have the necessary permission.
-
Site preparation. The crew removes sod or old concrete, then excavates to the required depth. A standard pedestrian patio typically requires a digging depth of 7–9 inches to accommodate the gravel base, sand bed, and paver thickness. The ground is graded so a slight slope directs water away from your home’s foundation. Building a paver patio requires careful excavation and a solid compacted gravel base-this is the foundation everything else depends on.
-
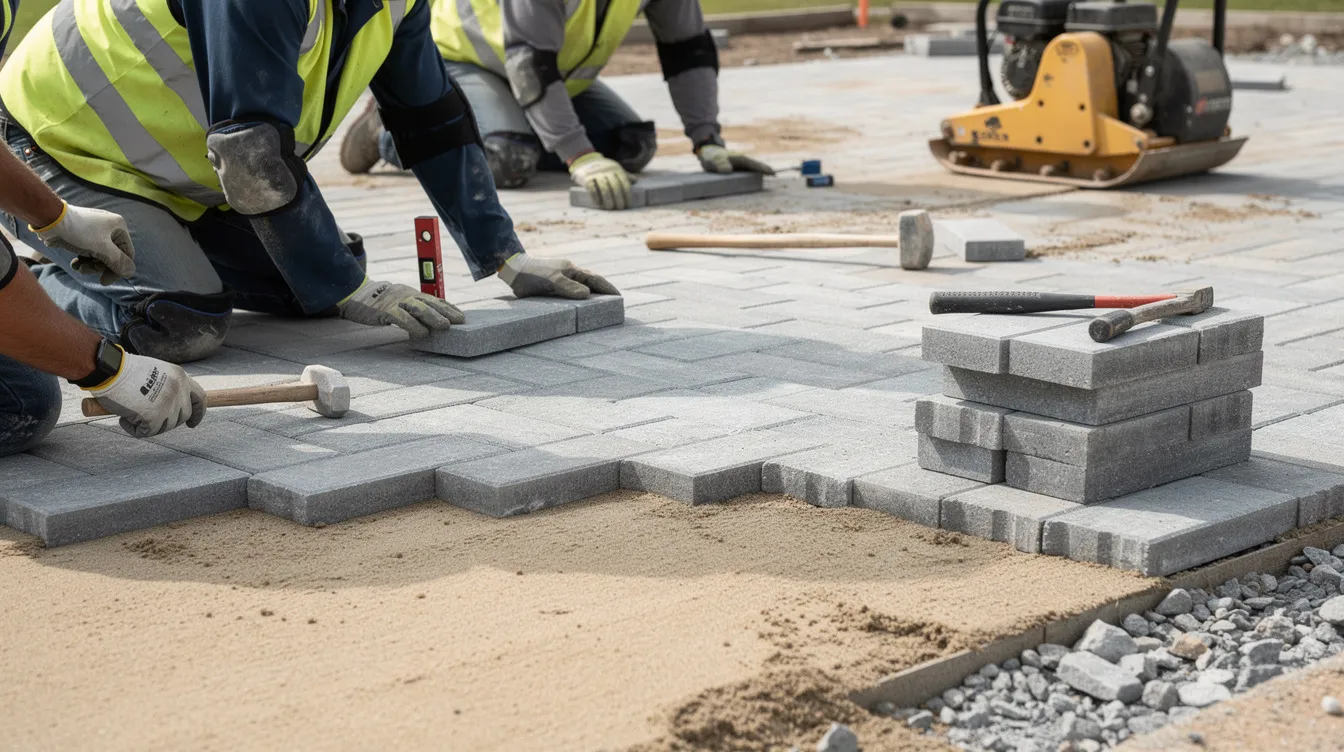
Base construction. Multiple lifts of crushed stone or gravel are spread and compacted, typically totaling 4–6 inches. A 1-inch layer of bedding sand is added after the gravel base, screeded flat and level to support the pavers evenly.
-
Laying the pavers. Starting from a straight reference line or fixed edge, pavers are set in the chosen pattern. Pavers must be laid gently onto the sand bed to avoid damage or displacing the leveled surface. Border pieces are cut with a wet saw or splitter for a clean edge. Whether your design calls for weathered flagstone or crisp concrete units, careful placement here determines the finished look.
-
Edging and jointing. Plastic, metal, or concrete paver edging is used to secure the perimeter of the patio and prevent lateral spreading. Some contractors use an integrated edgesuite system that combines restraint and drainage in one profile. Fine polymeric sand is swept into the gaps between pavers during installation, then the entire surface is compacted with a plate compactor to lock everything in place. Skipping steps in paver patio construction often leads to sinking or shifting down the road.
-
Timeline and expectations. Many residential pavers patios between 150 and 400 square feet take 2–5 working days once the crew begins, depending on demolition needs, weather, pattern complexity, and features like steps or fire pits. Confirm project timelines and cleanup expectations in writing before work begins so there are no surprises.
Maintenance & Longevity of Paver Patios
One of the strongest selling points of a pavers patio is how long it lasts with relatively little effort. Set reasonable expectations and follow a simple routine to keep your surface looking fresh for decades.
-
A well-installed pavers patio can last 30–50+ years. Cobblestone pavers can last up to 100 years with proper maintenance, and dense natural stone often outlasts even that. Concrete pavers can last up to 50 years with proper maintenance, especially when sealed and protected from harsh chemicals.
-
Routine care is straightforward: sweep debris regularly, rinse with a hose, and spot-scrub stains with mild detergent. Regular sweeping prevents organic debris from trapping moisture or staining patio pavers. Avoid harsh chemicals that can discolor brick or concrete surfaces. Routine maintenance includes sweeping debris and maintaining polymeric sand joints.
-
Joint care keeps your surface tight. Re-sweep polymeric sand into joints every few years if erosion from rain or foot traffic has created gaps. Inspecting joints yearly helps identify the need for replenishing sand and sealing before weeds or ant tunnels get established.
-
Optional sealing every 3–5 years helps concrete pavers and some natural stones resist stains and UV color fading. Flagstone pavers may require breathable sealers suited to their porosity-standard film-forming sealers can trap moisture and cause spalling.
-
Winter care in cold climates: Use plastic shovels to clear snow, avoid metal blades that chip surfaces, and limit deicing salts. It is recommended to avoid harsh chemical de-icers on concrete during winter, as they can pit or discolor the surface. Permeable pavers can also help manage snowmelt drainage, reducing puddle formation and ice buildup.
Working With Professional Paver Installers
Hiring the right crew is just as important as picking the right material. A beautiful patio designed with premium stone can still fail if the installer cuts corners on base prep or drainage.
-
Seek the best paver installers with a warranty and several patterns to select from. Ask each candidate to show you at least three design options using concrete, brick, or flagstone pavers-ideally with completed project photos so you can see how the materials have aged in real-world conditions.
-
Verify licenses, insurance, and local references before signing any contract. Request photo galleries of completed patios, including cobblestone pavers projects if that’s the style you prefer. A strong portfolio tells you more than any sales pitch.
-
Get detailed, written estimates that separate base preparation, paver material, labor, additional features (steps, fire pits, seating walls, accent walls), and any haul-away fees. Vague lump-sum quotes make it hard to compare bids or hold anyone accountable.
-
Ask specific questions about drainage strategy, expected project duration, and what labor warranty they provide on settling, joint failure, or edge movement. Good installers will also explain long-term maintenance, provide manufacturer brochures for the chosen pavers, and clarify lead times-which can stretch to several weeks during peak spring and fall seasons.
-
Don’t be afraid to ask how they handle color-batch matching if you decide to expand later, and whether they stock or can order permeable paver options if stormwater management matters in your area. The goal is finding a partner who helps you make smart decisions, not just someone who lays down stone.
How Digital Vibes Agency Helps Paver Patio Installers Get More Clients
If you’re a paver installer or hardscaping contractor reading this, you already know that homeowner demand for outdoor living spaces is climbing. The challenge isn’t a lack of projects-it’s making sure those homeowners find you before they find a competitor. That’s where digital marketing becomes a growth engine.
-
Digital Vibes Agency, based in Chandler, AZ, specializes in helping local landscaping and hardscaping companies turn patio and paver photo galleries into steady online lead sources. We understand the seasonal rhythm of this industry and build campaigns that ramp with demand.
-
Our SEO services target terms like “pavers patio near me,” “flagstone pavers installer,” and “concrete pavers patio Chandler AZ” so that qualified homeowners find local contractors on Google instead of national directories. Strong local SEO and a fully optimized Google My Business profile make your company the first name homeowners see when they search.
-
PPC campaigns through Google Ads and Meta Ads can be optimized around high-intent searches like “brick pavers patio cost” and “cobblestone pavers installation” to generate immediate quote requests while organic rankings build over time.
-
We rebuild or refine contractor websites with fast-loading project pages (hosted on a reliable server with optimized http-to-https redirects), clear before-and-after galleries, and visible warranty and pattern information to improve conversion rates. Homeowners want to see finished work-not stock photos.
-
Analytics and call tracking let us measure which campaigns bring real patio consultations, so we adjust budgets toward the highest-ROI channels. If you’re ready to compete for more local projects, explore our marketing services or view our portfolio to see how we’ve helped similar businesses grow.
FAQ About Pavers Patios
How long does it take to install a typical pavers patio?
Many residential pavers patios between 150 and 400 square feet take 2–5 working days once the crew begins, depending on demolition needs, weather, pattern complexity, and features like steps or fire pits. Larger patios with natural stone or elaborate designs-circular fan patterns, multi-level layouts, integrated lighting-can stretch the timeline to a week or more. Always get a written schedule from your installer before work starts.
Can a pavers patio be installed over an existing concrete slab?
Installers can sometimes overlay pavers on a sound, properly sloped concrete slab using a thin bedding layer, which saves the cost and time of full demolition. However, they avoid this approach if the slab is cracked, poorly drained, or heaving, because those problems will telegraph through to the new surface. In those cases, removal and a new compacted gravel base are recommended to ensure long-term stability and proper drainage away from the home.
Are weeds inevitable between pavers?
Weeds usually come from airborne seeds landing in joints, not from beneath the patio. Polymeric sand, proper compaction, and occasional spot-spraying or hand-pulling dramatically reduce visible growth. If you stay on top of joint maintenance-re-sweeping sand every couple of years and addressing gaps promptly-weed problems remain minimal rather than inevitable.
Which paver material stays coolest in hot sun?
Lighter-colored concrete pavers, some flagstone pavers, and certain travertine or limestone options reflect more solar heat than dark cobblestone pavers or black and charcoal concrete, making them significantly more comfortable for bare feet in hot regions like Arizona or Southern California. Porcelain pavers also tend to stay cooler due to their density and reflective properties. If your patio gets full afternoon sun, material color and density should be near the top of your decision list.
Can I add on to my pavers patio later?
Expansions are possible and often easier with pavers than with poured concrete, since you’re working with individual units rather than matching a monolithic slab. The main caveat is that color batches can change over time, so save extra pavers from the original project and work with an installer who can blend old and new sections seamlessly. Choosing a widely available paver line from a major manufacturer also makes future matching simpler.